Tags

4-H 60s Accessories animal April apron Autumn baby bag baking balloon(s) Basics basket(s) Bathroom beach beads bear Bedroom bird birdhouse birthday blanket Bleach blessing(s) blood book bookmark bottle bottle cap bowl box bracelet braid Bug/Insect bunny butterfly button cake calender camp Camp Tales can candle(s) candy canvas card stock cardboard carnation carrot carton cement center piece ceramic charm(s) chess chest childcare chocolate choker Christmas clay clay pots clothing cloud clown clutch Coaster Collage collage purse collection(s) container(s) corn cosmetics cosplay costume Craft Hall craftsnob.com create creation crepe paper cross cross stitch cupcake curtain(s) Cut Outs decoration decoupage deer demonstrations denim dessert Dining Room dog doll Dollhouse dove drawing dream catcher dream(s) dress drum dye earrings ears Earth Day Easter egg(s) electric Elvis embroidery embroidery floss event express eye(s) fabric fair family fantasy fashion favor feather(s) felt female fire fish flannel fleece flower(s) foil food Fool(s) friendship bracelets fruit furniture gag(s) game garden garden stones Geisha gift(s) Girl Scout glass glitter globe glove(s) god's eye gold Goth hair Halloween handbag hat heart hemp hippy Historic holiday home hope hot glue house incense burners inspiration inspire instructions Instructor instrument Irish Iron Iron On jar jewelry Jewish journals jug June kit kitchen knit(ting) lace Ladies Who Craft lamp leaves legging(s) locket love macrame Magnet(s) manifesto map March Martha Stewart MASH mask May Medievel memo board memories memory keeping mermaid(s) metal Mod Podge Mosaic(s) Mothers Day movie mud mushroom music musical nail polish nail(s) Napkin Holder napkin rings napkins nature necklace needlework no-sew Nostalgia ocean October Old Magazine(s) Oriental original ornaments outdoor oven owl paint pants/shorts paper paper bag paper box paper mache' paper plate Paperdoll paperweight Patch(es) Peace peace sign pearl(s) pencil Pet Rocks photo album photo(s) picture frame Pig(s) pillow cases pillow(s) pin Pirate place mats Planters Plaster plastic plastic canvas pocket(s) Poetry Poll pom pom pop(s) power tools prop psychedelic Punk purse Quetzel quilt quote raccoon Rag Rugs Rag(s) rain rainbow Re-Enactment rebel rebellion recipe recycle Ren Faire Reptile/Amphibian retro ribbon ring(s) Rocky Horror Picture Show rose Rug(s) salt dough sand scarecrow scarf school scrap booking sculpting seashell sewing sewing machine shelf shirt/blouse shoe(s) Shrinkies skirt sleep snake spider spray adhesive Spring sprinkles St. Patty's Day star stick(s) stocking(s) storage string Summer Supervisor sushi swan sweet Sweet Dreams t-shirt Table Runner Table Setting Thanksgiving theater thread Tie Dye tissue paper tools tote toy travel tree(s) turkey TV twisty ties vegetable(s) veil vest video VW Bug Wall Hanger(s) water weather wedding Winter wire Wizard of Oz wood woodburn woodworking worry dolls www.cutoutandkeep.net yarn zipper
Showing posts with label Collage. Show all posts

Thursday, July 14, 2011

Picture Frame Thank You

Picture frame I made as a thank-you for my aunt. (She helped me every night with my hair for a 60s-70s themed show.)
I started with one cardboard/pressed paper picture frame that I gently took apart.
Then decoupaged with pictures and words cut from the program. (Seal well and let dry.)
Accented with blue glitter paint. (Then let dry.)
Using a hot glue gun, reattach front to back. Make sure to leave opening unglued. (Mark it when you take it apart of needed.)
When everything is dry and put together - add picture. (I added a  picture of her and I backstage with me in full costume.)

Saturday, June 4, 2011

Decoupaged Elvis Picture Frame

I LOVE Elvis! For those who know me well, this is not a big surprise. I have a nice collection of Elvis memorabilia, but as with any collector they always have room for more. My love of Elvis reaches far before I can remember into early elementary school. No is one really sure how it started, it just did and it stuck. All these years later and it's still stuck... which led me to decoupage this pressed cardboard/paper picture frame with Elvis images.

Doing a project a project like this an be done with a thinned out white glue (the kind that dries clear) or a Mod Podge and an old paint brush. I have both on hand.

1) I started with one picture frame. (This holds a 3 1/2  5 inch picture.) I have a small stash of the that I picked up in a craft section. They have different shaped openings but for this project I liked the star. I then removed the plastic photo cover from the inside. (This keeps the paint off of it.)

2) I then gently seperated the front from the back. This is totally optional. They were glued together to start, but I figured it would be easier for what I was doing.

3) I collected my Elvis images cut from a magazine and laid them out to work.

4) I then went to work on decoupaging my images in a collage on the front of the picture frame, layering it securely between layers of thinned glue and Mod Podge. (My Mod Podge is running low so I stretched it with some thin white glue, but I made sure the top layers were all Mod Podge.) You want to make sure the keep everything nice and smooth, the edges sealed nicely under the glue or Mod Podge (or whatever else you have on hand.) Don;t be afraid to use enough layers that it is nice and thick and white. It will dry clear and you want to sealed in.

5) Let dry completely.

6) I then re-glued the front to the back, making sure to leave the opening at the top to insert the picture. (I have a few ideas for what might go inside it.)

Yes, I am an unapologetic Elvis-loving freak and I love every minute of it. And I really do not care that some people might not find it "cool" or whatever else. I say, embrace who you are and love what you love. Life is more fun that way.


Sunday, May 8, 2011

Mother's Day Envelope Book with Cards

Celebrations, holidays, special events, and just everyday happenings send me to constantly find new inspiration. Mother's Day is no exception. If anything, there is something about Mother's Day that raises that stakes to make it more meaningful. Flowers are overrated sometimes and my mother tends to kill houseplants. Candy is fine for those that like it, but she's not a big candy person either. Plus, candy and flowers don't last. I, of course, wanted something different.

I starter with cards for my mother and grandmother - a multiple folded card spanning four generations of the women in my family; that included a young pictures of me, my mother, my grandmother, and my great grandmother (entirely maternal lines) with a short poem I wrote. The initial idea from something from Martha Stewart's Family Tree cards. I made one for each my mother and grandmother.

For my mother I wanted to make a non-traditional scrap book type thing. (Last year I made her a mini book full of quotes about mothers and motherhood with a clay rose.) I got inspired when I found a new twist on an envelope scrapbook. Admittedly, I often come across projects that I have already done or taught, but this one gave me a few ideas. (Check out a Flip Flop Envelope Book here.)

I decided to use six envelopes I had on hand left from Christmas cards, figuring one pocket for each one of my mother's five kids and one overall pocket. I looked at using more traditional scrap book paper, but decided against it. I stuffed the pockets with a card inspired from the four generation  card above, but created one for each pocket, each one fitting the theme of the pocket. I embellished each card with various pictures takes over the years with poems and quotes about mothers, Mothers Day, and motherhood.


Attach end to end by flap, making sure not to seal top. Making one long strip.

I made a sturdier and rectangular shaped top flap with a piece of card stock cut to fit over the triangular flap. Then  secured.

Using jewel inspired magazine cut outs I decorated the exterior of the long strip of envelops. I kept this decorative, but rather simple.

I then decorated the inside with more collaged pieces cut from magazines and mixed with a picture and name for each pocket. (I used pictures here form when we were all younger, including a picture with all five us for the top one.)
I then turned to folding and decorating my cards (made from half a sheet of card stock folded accordion style into four equal sections.)  for each pocket with pictures, poems, quotes, and other bits.


I stuffed each pocket, including a printed history of Mothers Day in the top pocket. (With room left for cards or more in each one.)
Folded closed and ready to go. Happy Mothers Day!

Thursday, March 10, 2011

'Rocky Horror Picture Show' Collage Purse

For anyone who has ever gone to see a production of Rocky Horror Picture Show (RHPS) in a theater AND dressed up (or dressed down as the case may be), you know it can be hard to find a place to put essentials like money and ID and whatever else you need. As I result I found an idea posted on cutout + keep for a collage handbag. I ended up making two of them (one for me and an extra for 'just in case' or for a friend). (RHPS Collage Bag.)

I started with an interior sheet of my own doodles and movie references with a couple of my own lipstick prints. (Hey, it is Rocky Horror after all. I wanted it to stick to the theme all the way.) On the opposite side I made a collage of from old advertising and hand outs from shows I had attended from Rocky Horror with Mod Podge to give a nice glossy surface. I was able to create something fun and fitting to go along any of the things I've been known to wear to showings.

Using old page protectors (I had a couple with torn holes) to cover the collage decorated sheets, I sewed up the edges with black and red thread to form an envelope style purse. To add a little flash I added glitter inside the clear page protectors, secured inside after sewing. With bits of Velcro as closures, the clutches were completed and ready for any Rocky Horror outing. (Frankenfurter, where are you?)
I believe that sometimes if you can't find the perfect accessory, you might just have to make it yourself.

Thursday, March 3, 2011

Dollhouse Book for Paper Dolls - A Doll's Dream House

Cover


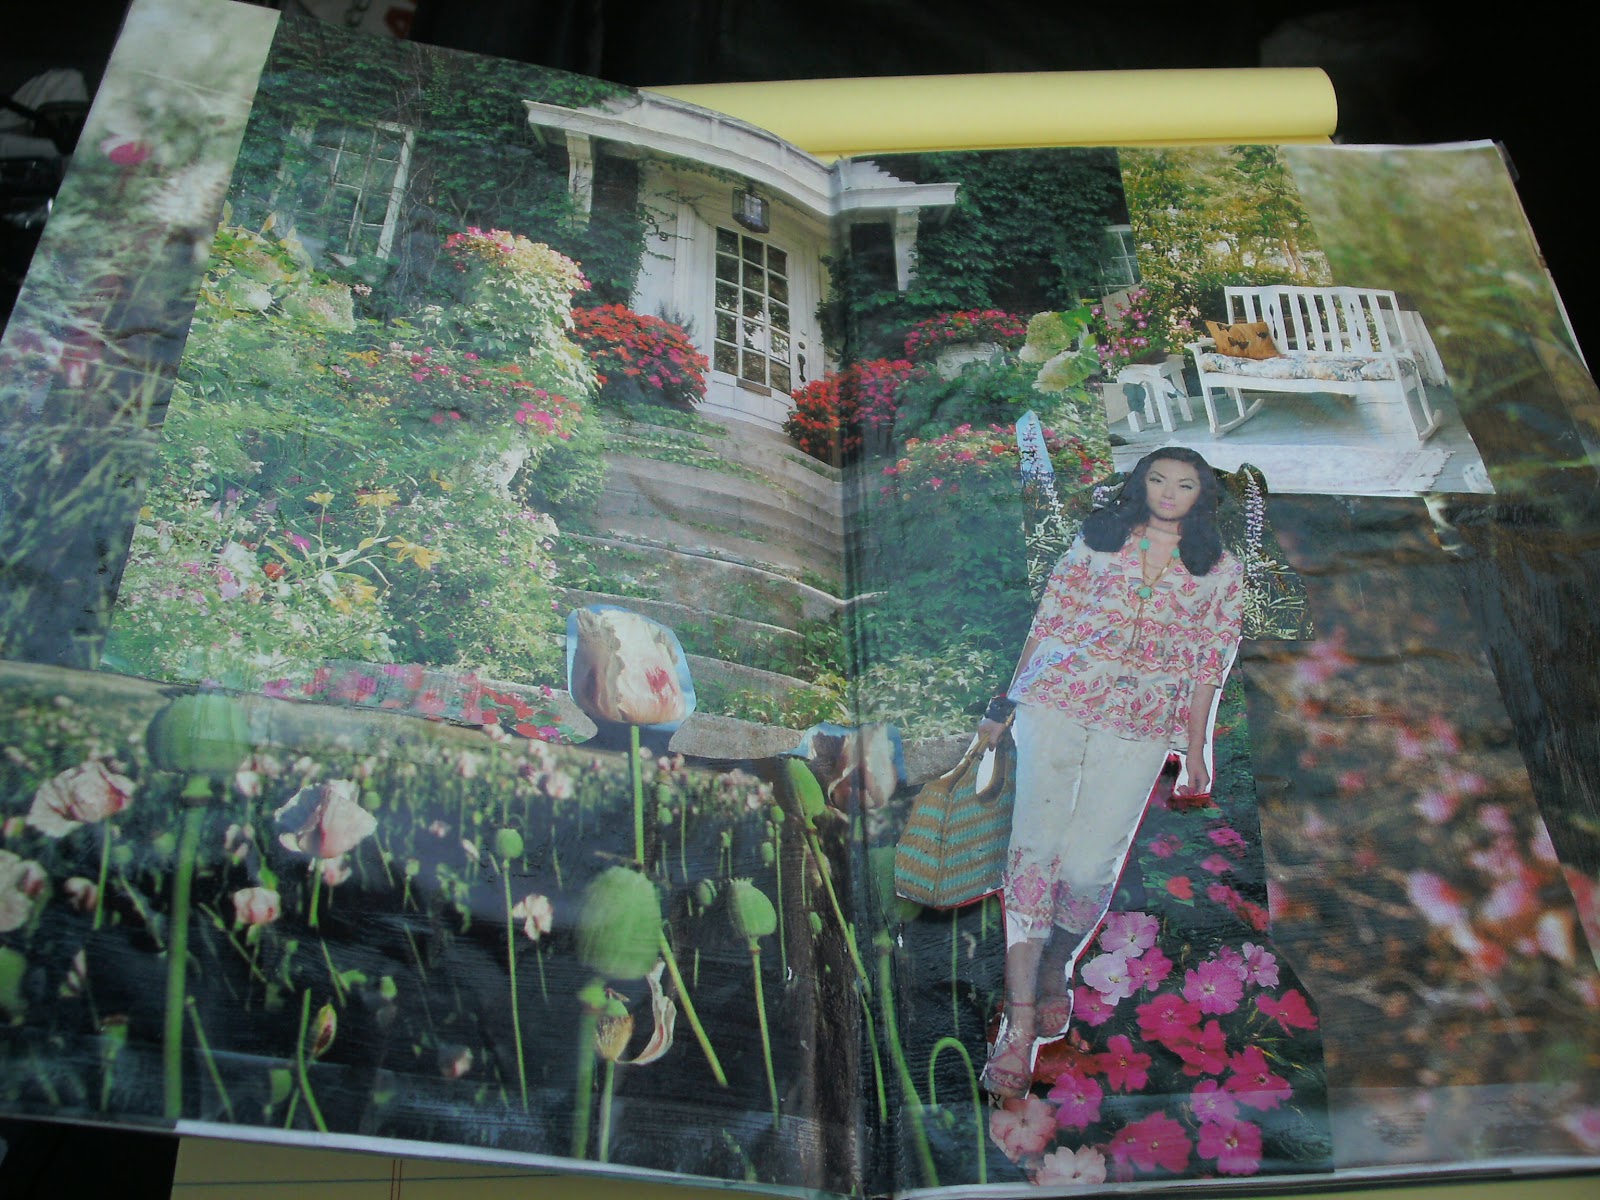
I grew up playing with paper dolls. Often overnight trips to Grandma's (or other family) meant a new book of paper dolls and a shoe box to store them. I had a variety over the years from Princess Di to various Barbie and all sorts of others involving family vacations, weddings, and career. I would play for hours separating the dolls from the books, settings them up, trying on their various outfits, and then using plain paper with crayons or colored pencils to make my own clothes for them. I was never great at drawing, but I tried and I got a certain sort of satisfaction out of it. As I got older and nostalgic started to set in, I realized that paper dolls are really hard to find, not like the shelves of them I remember from when I was a kid. I thought about drawing my own, but I know my artistic limits. Still my nostalgia for all things doll has continued. In this quest I came up with this Dollhouse Book for Paper Dolls made from ads & magazine pictures collage-pieced together to create rooms the right size for dolls I made from magazine cut outs glued to card stock.

Supplies: Paper, Card Stock, Mod Podge, Clear Tape, Scissors, Old Magazines and Ads.

The Dolls
I started with finding pictures of people to use that were about the same size and included a view of head to feet (this was important).  Using Mod Podge I attached the pictures to card stock and trimmed the edges, then sealed them in with more Mod Podge. Going through my stack of magazine and using the first doll as a guide I tore out pictures for the rooms that were the appropriate size. I used paper folded in half with a cardstock cover to make a book.
The Front Garden

Using the pictures torn from the magazines and ads I pieced together pictures to create rooms for the dolls to inhabit starting with a front garden full of flowers and plants, a living room, a dining room with a table and outside patio view, a kitchen with cabinets and a refridgerator that had doors that opened to reveal groceries and kitchen items, and a bedroom with wallpaper and bedroom furniture.

I cut slits throughout each scene to fit the paper dolls to stand behind items such as flowers, a table, or chair. Then for the kitchen I cut doors that opened and cut items for placement inside these openings. I took these openings in mind carefully as I glued the pages and collages to the book I made to house this paperdoll world. Everything was secured with Mod Podge. I used clear tape around edges including the outside where the pages connected as well as slits and openings.

For those who might want to try a paperdoll house book for yourself or just enjoy paper dolls in your own way I found some great (and free) paper dolls that you can print at home from your home computer. (Or do your own search, you never know what you might find.)


If you are more talented than me (which means you can draw pretty much anything that comes out looking more like a person or animal than a stick figure), you might even try drawing your own.

This may be my first attempt, but I doubt it will be my last. I already have a list of ideas to play out next.

Check out here to: http://www.cutoutandkeep.net/projects/dollhouse-book-for-paperdolls .