Tags

4-H 60s Accessories animal April apron Autumn baby bag baking balloon(s) Basics basket(s) Bathroom beach beads bear Bedroom bird birdhouse birthday blanket Bleach blessing(s) blood book bookmark bottle bottle cap bowl box bracelet braid Bug/Insect bunny butterfly button cake calender camp Camp Tales can candle(s) candy canvas card stock cardboard carnation carrot carton cement center piece ceramic charm(s) chess chest childcare chocolate choker Christmas clay clay pots clothing cloud clown clutch Coaster Collage collage purse collection(s) container(s) corn cosmetics cosplay costume Craft Hall craftsnob.com create creation crepe paper cross cross stitch cupcake curtain(s) Cut Outs decoration decoupage deer demonstrations denim dessert Dining Room dog doll Dollhouse dove drawing dream catcher dream(s) dress drum dye earrings ears Earth Day Easter egg(s) electric Elvis embroidery embroidery floss event express eye(s) fabric fair family fantasy fashion favor feather(s) felt female fire fish flannel fleece flower(s) foil food Fool(s) friendship bracelets fruit furniture gag(s) game garden garden stones Geisha gift(s) Girl Scout glass glitter globe glove(s) god's eye gold Goth hair Halloween handbag hat heart hemp hippy Historic holiday home hope hot glue house incense burners inspiration inspire instructions Instructor instrument Irish Iron Iron On jar jewelry Jewish journals jug June kit kitchen knit(ting) lace Ladies Who Craft lamp leaves legging(s) locket love macrame Magnet(s) manifesto map March Martha Stewart MASH mask May Medievel memo board memories memory keeping mermaid(s) metal Mod Podge Mosaic(s) Mothers Day movie mud mushroom music musical nail polish nail(s) Napkin Holder napkin rings napkins nature necklace needlework no-sew Nostalgia ocean October Old Magazine(s) Oriental original ornaments outdoor oven owl paint pants/shorts paper paper bag paper box paper mache' paper plate Paperdoll paperweight Patch(es) Peace peace sign pearl(s) pencil Pet Rocks photo album photo(s) picture frame Pig(s) pillow cases pillow(s) pin Pirate place mats Planters Plaster plastic plastic canvas pocket(s) Poetry Poll pom pom pop(s) power tools prop psychedelic Punk purse Quetzel quilt quote raccoon Rag Rugs Rag(s) rain rainbow Re-Enactment rebel rebellion recipe recycle Ren Faire Reptile/Amphibian retro ribbon ring(s) Rocky Horror Picture Show rose Rug(s) salt dough sand scarecrow scarf school scrap booking sculpting seashell sewing sewing machine shelf shirt/blouse shoe(s) Shrinkies skirt sleep snake spider spray adhesive Spring sprinkles St. Patty's Day star stick(s) stocking(s) storage string Summer Supervisor sushi swan sweet Sweet Dreams t-shirt Table Runner Table Setting Thanksgiving theater thread Tie Dye tissue paper tools tote toy travel tree(s) turkey TV twisty ties vegetable(s) veil vest video VW Bug Wall Hanger(s) water weather wedding Winter wire Wizard of Oz wood woodburn woodworking worry dolls www.cutoutandkeep.net yarn zipper
Showing posts with label storage. Show all posts

Monday, June 20, 2011

Ceramics Flashback

This jewelry box was from my eighth grade art class. (I re-found it recently packed away in a box.) Once upon a time it had a square lid with a handle that fit it approximately. The lid seems to be a casualty of time, but the box itself is in one piece. It still is engraved with my last name and class period on the bottom (from before it went in to kiln) as well as my full name, year, and what appears to be y teacher's grade penciled on the bottom of it. (Pretty sure it was an A.)

 It may not have been perfect but for a kid it was my way from the shape to the heart on one side to the rough rainbow on the other and the green and brown glaze.

I have a lot of great memories from that lass... it seems some that even have something to do with art. It was the last art class I took in school choosing to spent my high school arts in music.


Tuesday, June 14, 2011

Jewelry Bowls

We are surrounded by things that can be given new life and made into something else. I made these jewelry themed bowls, the perfect size and theme to hold rings, other jewelry or change on your dressing table or dresser (I love little things like this).

One of the best parts - everything was from stuff I already had around the house. (And it's even recycled! How can you not love?)

This is a rather easy project that uses paper mache' techniques to create, with drying time taking up the most of the time. Just a little patience is all it takes.

Supplies
* a glass bowl or other container, any size (to use as a mold) - (for this project I used small glass bowls from our cupboard that are were about four inches across and often used for dips or fruit in out house)
* plastic wrap (to cover the mold)
* white glue or Mod Podge (something that will dry clear and secure everything together smoothly)
* old paint brush (for use with glue) - paint brushes are awesome to use with paint or decoupage
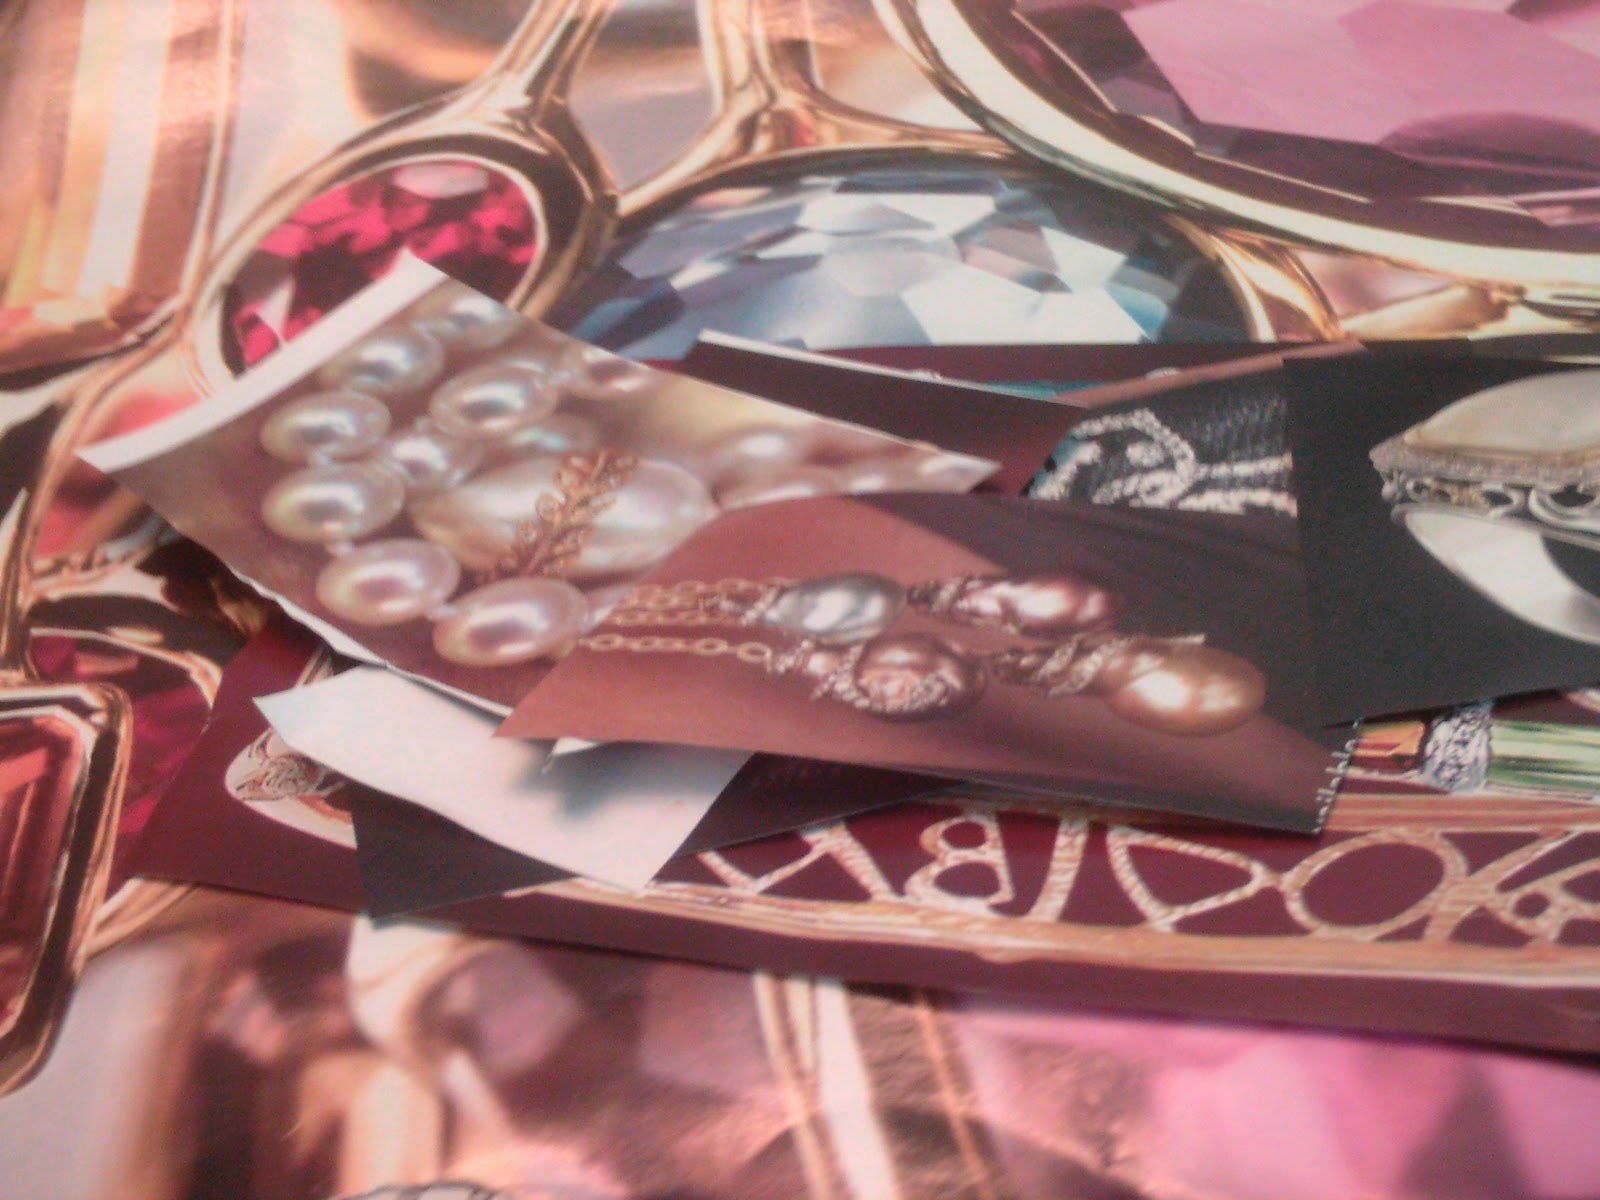
* desired paper such as magazine pictures or newsprint (I used magazine pictures of jewelry and gem stones from magazine ads)
* scissors or craft knife (as needed) 
 * OPTIONAL: desired embellishments (such as glitter, pearl wire, beads, ribbon, or whatever inspires you) and something to attach (such as the white glue from before or a hot glue gun)

(1) Start with laying plastic wrap across the bowl that you are using as a mold. This will keep the finished project and glue from sticking to the bowl. (You can use other types of plastic, but I preferred the clear plastic wrap so that I could see through as I worked.)

(2) Start layering the paper with glue inside the mold, using the paint brush to spread the white glue or Mod Podge evenly across the pages. Using the glass and clear to position the images on the outside of the creation. Build this up to desired thickness placing multiple layers of paper and glue. I positioned the inside with images like the outside to create a design. Using the paint brush with glue make sure there is a nice smooth layer of glue or Mod Podge to secure the outside edges and give a smooth outer layer. (You don't have to worry about the edges being uneven that an be taken care of later after everything is dry.)

(3) Let dry.

(4) Once the bowls are more set up you can remove from the mold and gently peel off the plastic wrap. Let dry completely.

(5) Apply more layers of white glue or Mod Podge as needed to seal securely. Spread glue on the outside to secure and seal outside edge.

DO NOT BE AFRAID TO LIBERALLY USE YOUR WHITE GLUE OR MOD PODGE TO REALLY SECURE AND SEAL EVERYTHING INTO ON PIECE.

(6) Trim edges with craft knife or scissors for a lean edge.
 Let dry completely.

(7) One everything is COMPLETELY DRY embellish edge as desired. In this case I used a white glue around the edge then dipped in colored glitter for a couple then pearl wire attached with a hot glue gun. (You could leave plain or embellish with whatever you have on hand such as ribbon beads old jewelry pieces or whatever else.)

Great for gifts or to catch your bits and pieces around the house. The options are endless - you an use any size bowl, attach a few together, add legs or another base. Experiment. Decorate. Share. Enjoy. And never forget to let your imagination run wild!


Saturday, June 11, 2011

A Tisket... A Tasket... A Basket..

Sometimes it's fun to go back and find things you made years ago that you still have around and still get some use. This basket is one of those things. I remember making it, but I don't remember where or how. It could have been 4-H, Girl Scouts, or something else. (I do come from one of those crafty type of families.)

Saturday, May 21, 2011

Gifts Recieved - Gifts Treasured

 Over the years I find some of the greatest treasures to be those that were created or embellished by hand, not machine. Creation and art is life and means more than you can find at any superstore. We need to celebrate the hand made arts more, the people that create them, and the people who give them. They are truly beautiful.

The first is a hand made cross, I think it was crocheted. To be honest, crochet, knitting, and the like are things I know little about. (I'm just learning to knit on my own.) Someone made these cross bookmarks for me and my siblings but I can't remember who. An older family friend perhaps. (I feel bad for this, but I can't help it.) Some of them were of only one color, but I favored the one with the rainbow of colors. For years it hung on the bulletin board in my bedroom.

The little girl figurine was a gift from a my grandmother years ago for Christmas, crafted  by a friend of hers from church. The tiny book in the doll's in hand is "Christy." It is a movie and mini series that we shared. It doesn't sit more than 2 inches high.

The small chest was a gift fro a friend in high school. She found a small chest and stained it in a cedar to match the cedar chest I had made years before. I use it now to hold coins I've collected from different around the world as well as my small collection of pressed pennies. It sits on a shelf in my room amongst old family photos.

Embrace the gifts that mean the most because they were chosen just for you, made with someone's own hand.

Saturday, May 7, 2011

Pin Cushion Jar

Anyone who sews or crafts knows how important the tools they use are. Taking a little inspiration from Queen Martha (as in Martha Stewart and her website), I made this to keep on hand and as a handy gift for other sewers in my life (Mom, Grandma, Aunt someone or other, or just a best friend). I use this one as a button jar. (Something we can all use on hand.)

So, use one of those jars you might have on hand (especially if you or someone or know is into canning), a scrap of fabric, a bit of cardboard, a little extra bit of filling/stuffing and make one for yourself (or someone you know).

Friday, April 29, 2011

4-H Woodworking

Bulletin Board
Book Shelf
I grew up doing woodworking, I took a cedar chest to state fair, I helped with 4-H State Fair judging, and I taught woodworking basics at camp. It seems the carpenter bloodline showed through. 4-H gave me great opportunities to build things and to learn new woodworking skills. It also let me build things for my room at the time, many of which I still use.

The blue bordered bulletin board was a 4-H woodworking project that I made for my room in elementary school and now use in my Craft/Sewing Room. At any time it can be holding any selection of instructions, patterns, sketches, projected (completed or in process). It was made with my woodcutting advisor in his wood shop, using the same pattern his daughter had used to make one before me.

 The year I made my bookshelf, most of the kids in that project had made a full size bookshelf, but I had a small bedroom and limited space. Instead, my advisor helped me come up with a smaller shelf that could hang from the wall or sit on my head board. (My bed at the time at build in bookshelf as the headboard and the width was perfect to sit this shelf on top of it.) I got to learn about making drawers. The shelf now holds many of cookbooks and herb books, a treasured piece that I use everyday.

The basket was a Club 4-H project on trees. We did all sorts of tree projects and activities; that included tree planting, trips to see the process of apple cider and maple syrup, and creating something from wood - in this case it was making baskets from wood strips.

Thursday, April 28, 2011

My Cedar Chest

I learned how to work with wood at a fairly young age. Some of my fondest memories from my childhood were spent with my grandpa in shed he used as a woodshed and later working with him in his garage workshop. He was a perfectionist, better to measure twice and cut once.

As I stood by his side, learning to measure, cut, sand, and build he kept alive a long family tradition of woodworkers and carpenters in his grandchildren. Over the years he helped me with 4-H projects, including the building of my cedar chest in middle school. The rounded top cedar chest that had been carefully laid out and pieced together on his screened in front porch, got an outstanding at my county 4-H judging and was sent to State Fair. The day I went to state fair with it, we invited my grandpa to go with me and my dad, after all the time he had spent helping me build it. It sits in my bedroom and is in constant use.

My grandpa is gone, but I hold the memories of our time together close.

Thursday, April 21, 2011

Embellished Containers

Need a container? Embellish one.

Re-use those discarded kitchen containers into something new and functional with paint, decoupage, stickers, and/or any other fun embellishments you might have on hand.

We all have those cardboard, plastic, or glass containers from the kitchen that might otherwise be thrown away; but are the perfect size for holding bits, pieces, beads, buttons, or whatevers.

With a little creativity, a selection of paint, stickers, or decoupage you can transform a an ordinary oatmeal container (or any other) into something to store craft bits or something else. (Think about treasure containers for a kid or teen's room or your crafting room/space.) I often keep one on hand to use up leftover paint I have used for another project that would otherwise dry out or be thrown out and add over time. (Such was the case of the pictured container painted with flowers or the white and purple marbled container I use for beads.)

I turned one container into a "conversation starter," decorating the outside with decoupaged pictures of thought/conversation provoking buttons, saying, and inspiring decoration. (Mod Podge rocks!) I filled the inside with pieces of paper with quotes, topics, and all sorts of things that can help inspire conversation or bring new topics to any gathering. (See the picture below.) It's great to inspire new thoughts, new conversations, and new ideas.

Sunday, April 17, 2011

New Tote from Old Jeans

You need a new gym bag, what do you do? Go buy something new? Well, you could, but I went another route, turning an old pair of my brother's jeans into a tote for my gym stuff.

The zipper was busted and I don't have a machine strong enough to put in a new one, so this old pair of jeans was added to the scrap bin to find new life in another project. In this case a new gym bag for me. It is a lined boxed shaped bag with a smaller matching denim pouch to stick in side. The roomy bag was made from five mainpieces (front, back, two sides, and bottom), lined, with an added pocket inside and at the zipper. (I could have sewn it shut, but adding a pocket was more amusing.) It was build to ensure plenty of room for my shoes, work out clothes, towel, and shower stuff. Plus, it's totally washable.

It may double for a beach bag on an upcoming trip south.

Thursday, March 31, 2011

It Doesn't Always Have to be Storebought - Handmade Gifts

Handmade gifts are always best & I have a few from friends & family.

A friend made these metallic painted handmade little clay creations for the tables at her wedding (pictured with the green background). (An artist in her own right.) She wanted something original that she made to be a part of the decorations. They had natural variations in the process of hand forming each one. (Some of them has little hearts with her husband-to-be's initials. Mine is not one of them.) It's great to catch little things like rings and earrings or a delicate necklace. (Some of them had had little candles in them.) One of the best things about these - she did something her way and celebrated her art, incorporating it into her special day.

I grew up involved in community based groups (such as 4-H and Girl Scouts), that often put a great importance on volunteering and being a positive part of the community. It may sound corny or idealistic to some, but I would like to think it did help shape elements of my ideals and instill a sense of responsibility.

Napkin Holder
As a Girl Scout, one of these involvements included "adopting" a "grandparent" at a local nursing home we often visited. (Pretty typical community involvement project.) I got a feisty woman who liked to work on plastic canvas needlepoint, including a house design napkin holder (pictured) that she gave me. It's something that years later, I still have and still think of her fondly when I see it. It was something she shared with me.

The photo album was a birthday gift from aunt this year. She has really gotten into scrap booking projects and card making. She embellished the cover inside and out for a personalized birthday present (to go along with a handmade card and cookies from a nearby bakery).

Photo Album Cover
Inside Cover of Album

Tuesday, March 29, 2011

Decoupage Accessories

Decoupage is a great way to personalize a bit of your world; whether it's a notebook or journal, a pen/pencil cup, or a jar to hold little things (like straight pins or notes). Using Mod Podge, doodles, old magazines, discarded ads, stickers, bits of scrap fabric or ribbon, I've added my own personal touch (and helped others do the same) to notebooks (often used as journals), cleaned out cans (that would otherwise be thrown out), jars, and boxes. I have a few decorated cans and jars in my sewing/craft room help keep my things organized and to hold everything from pens & pencils to markers and scissors and sewing notions.

This is a great way to personalize all sorts of things and appeals to multiple ages from elementary school kids to teens and adults. It was super popular at camp in the Craft Hall with campers, counselors, and adult staff of all ages. We decorated containers as well as pieces of wood for wall hangings. Decoupage can be done with thinned down glue or using something like Mod Podge (which available in most craft departments and at craft stores). to secure everything and give a smooth finish.

Personalize your world.

Monday, March 21, 2011

Paper Box - How To

I love making paper boxes of all different sizes as they make great gift boxes, the smaller ones for trinkets, worry dolls, or homemade jewelry and larger ones for cookies, cupcakes, or other bits. I've been making them for so long, I don't even remember learning. They might have been something my mom taught me and/or something from my Girl Scout days (my mom was my leader for a long time). When working & loving at camp it was something I often taught kids, especially to store worry dolls, jewelry, or just for fun.

They can be made from plain, colored, or decorated paper and are a great way to recycle & reuse newsprint, comics, brown paper bags, doodles, or old wrapping paper. Versatile and can be made in all sorts of sizes.

Sunday, March 20, 2011

Flowered Bottle Necklace

Happy First Day of Spring!

In honor of this wonderful time of year, I was inspired to find a new project for some things I had sitting around here. Recycling some little bottles I had on hand I came up with this flowered bottle necklace that I am considering filling with wildflower seeds to wear carry with me. (Or to give to a friend to carry with them.) Sometimes, a person just needs to have some flowers to share with then world, even in the most powerful form of a seed. This is a super simple project that definitely helped me celebrate the coming of Spring and all it's beauty.

 I started with small glass bottle, I had left from candy making at Christmas time. (Every year I made hard candy for Christmas.) I have a small stash of these small bottles that the flavorings for the candy come in, cleaned and the labels removed. (So don't be surprised to see more projects utilizing these.)

Using acrylic painted I attacked a couple of these small bottles with greens and flowers, letting them dry between layers and then again at the end. (Of course, any theme could work.)

Once dry, I attached hemp cord securely around the neck of the bottle, knotting. (It has a nice earthy look and feel.) Using a bead pattern, I knotted the cord every so bit and added earth tone pony beads, securing the beads with the cord. I finished the end with a knot, leaving the cord long enough to slip over my head without needing a latch. (You could use any jewelry making technique, macrame knots, braid, or selection of beads. The one pictured is just the one I chose this time.)

Now, they just need to be filled with flower seeds and are ready to go. (Maybe give Mother Nature a bit of help spreading her colors.) Bring on Spring! Bring on the flowers!

(Of course, it also could be used for scented oils or something.)

Monday, March 14, 2011

Boxes

Painted pressed paper box
Sometimes you just need someplace to put your trinkets, treasures, jewelry, gifts, or other little bits. They come in all shapes and sizes, can be made from all sorts of materials, and can be decorated in a variety of ways.

I painted a fire-inspired marbling effect on the round pressed paper box that can be found at most craft stores. I accented it with the black swirls and sealed it with an acrylic spray sealer to keep the paint nice and to give it a nice shine. It's just the right size to hole loose chance emptied from a pocket, rings, bracelets, a necklace, worry dolls, little notes, a set of keys, or other little bits.

The pressed paper boxes are available in different sizes and shapes and can be used in all sorts of ways. I have a few that are small, dollhouse size.

The heart shaped box is made from fuseable beads and a heart shaped form. Using the heart shaped form I made two full hearts, one for the bottom of the box and one for the lid, fusing them per the directions with the special iron paper and an iron. Then I made three hearts that were just the outline of the heart to form the walls. Using a needle and thread I attached the bottom and the three side pieces to form a box. For the one pictured, I used a few stitches to attach the lid and make it flip up.

Fuse Bead Box
 There are a lot of things you can do with the fuse beads, available in kits the include the pegboards, special paper, and special fusing beads or beads and boards separately. We used the beads at one camp and I have used them with kids I have watched around home to make boxes, coasters, sun catches, dice, magnets, and other little things to hang and decorate with. (Check Out these pegboard forms) (Oriental Trading Co. Supplies) (Perler Bead Supplies)

The folded paper box is another nice little box that is versatile, easy to make, and a nice touch for certain things. They are a nice added touch for gift giving that can be made to preferred size. I use them for all sorts of  little things and gift giving.

Saturday, March 5, 2011

Magazine Bowls

Combining a number of things I had seen and come across  I made these bowls from discarded magazines. The full sheets were folded into strips and secured with glue sticks (think the purple glue sticks from school or scrapbooking). The base was made by combining multiple in an outward and tight circle. It was secured with dots of hot glue from my handy dandy hot glue gun (every crafter's best friend). For the side I rolled each strip individual strip around small tube I had (T tend to have a lot of misc. items in my arts & crafts stuff) and secured with hot glue. the sides where build by stacking the rolls, securing with dots of hot glue as I went along. The colors from the magazine strips gave a nice appearance, but I have done a couple painted.

I like to keep a small basket or bowl  inside my door and by my bedside as a place to hold and catch things like keys, a small flashlight (I like to be prepared), and those other little things that can otherwise clutter up places. This bowl works well for this or other things.